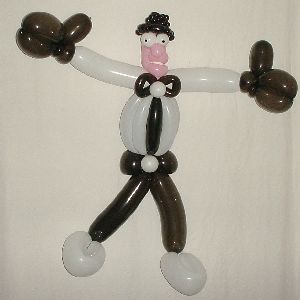
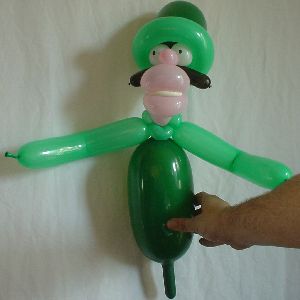
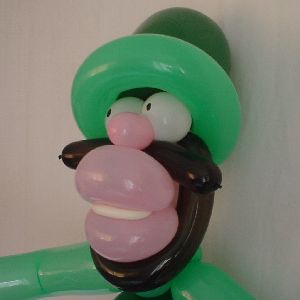
Why is he called fred? I don't know, it's just a fantasy figure and I named him Fred. The headbase is a design from Tom Saeys. This figure is also a good example on using balloons of different sizes to get the proportions right.
Balloons needed:
1 × 418Q green | 1 × 524Q green | 1 × 5" round white | 1 × 160Q pink | 1 × 160Q onyx black | 2 × 350Q coconut brown | 1 × 260Q wintergreen | 3 × 260Q pink
-
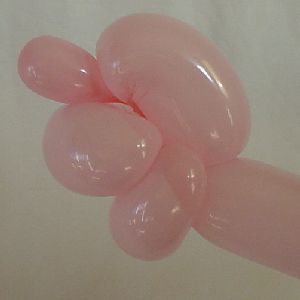
1 Inflate the end of pink 160Q and tie off. Leave a few inches of balloons on it and knot it again.

-
2 Marriage/hooktwist the end of the pink 160Q inside a pink 260Q.
-
3 Like this.
-
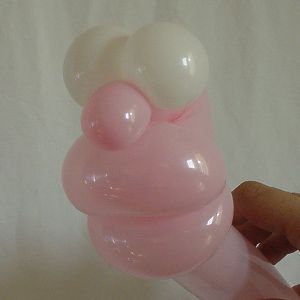
4 Make a stand alone double pinch twist from a pink 350Q and insert it at the end of the hooktwist.
-
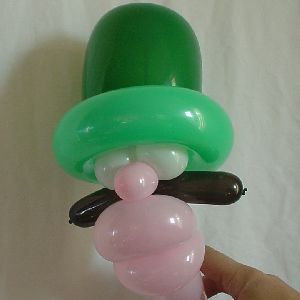
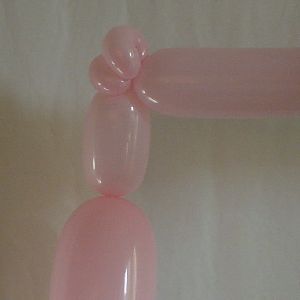
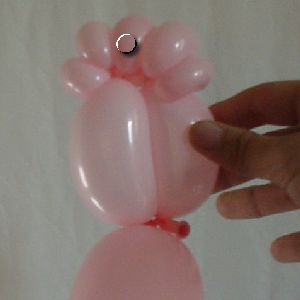
5 Underinflate 5" round and split in half. Insert between the pink 160Q and pink 260Q for eyes.
-
6 A black 160Q inserted in the same place makes a mustache.
-
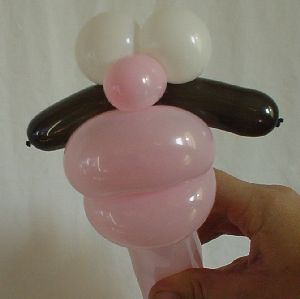
7 Inflate the green 418Q and make a tulip twist. Lock the twist by tying a peace of left over 260 around, make sure you got a little peace left.

-
8 Tie the peace of 260 from the 418Q to the head at the same place as the eyes.
-
9 Create a loop around the 418Q with a wintergreen 260Q
-
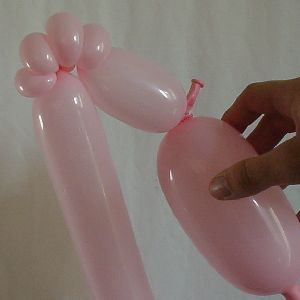
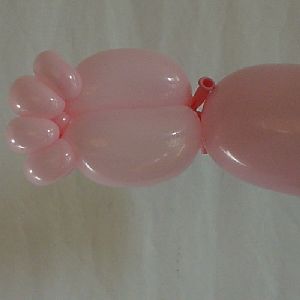
10 Fill a white 260Q with air (don't inflate it, just make sure it's full of air). Tie off a peace the width of the mouth and pressure fit inside the double pink pinch twist for teeth.
Draw on eyes.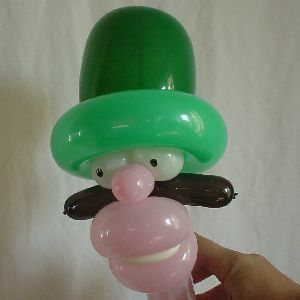
-
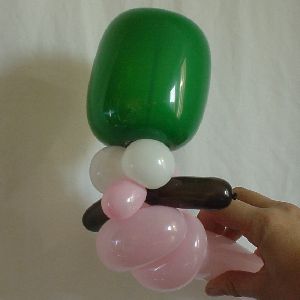
11 from the pink 260Q create a small bubble for the neck, deflate and cut of the remainder of the pink. Tie on a green 524Q. From a wintergreen 260Q make an arm, 4 pinch twists and a 2nd arm and insert between the pink 260Q and green 524Q.
-
12 Hands are made by marriage twisting a pink 260Q to the wintergreen arms. Followed by a 2 bubble locktwist, a pinch twist and a small bubble for a thumb. Cut of remained and use for other hand.
-
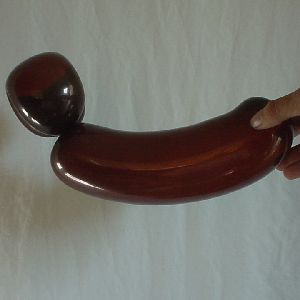
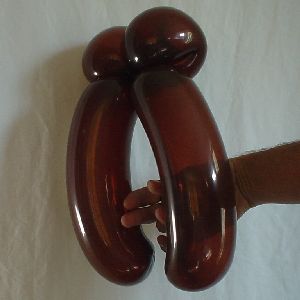
13 Hook twist a brown 350Q followed by a loop twist.
-
14 repeat this. and lock together.
-
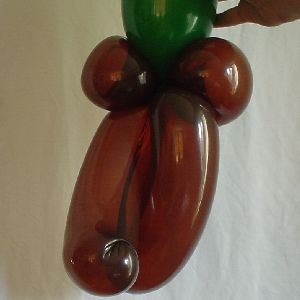
15 Attach at bottom of green 524Q. Then add a stand alone double pinch twist from left over brown to stabilize it.
-
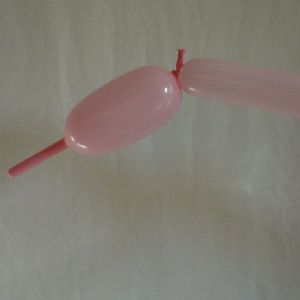
16 Tie a pink 350Q (you can use what you got leftover from the double pinch twist) to a pink 260q.
-
17 In the 260Q make a bubble, followed by a double pinch twist.
-
18 follow that up with a tiny tiny bubble and again a double pinch twist.
-
19 make a bubble and lock everything together creating a foot with 4 toes.
-
20 the 5th toe is just a stand alone pink pinch twist.
-
21 Insert it in the middle, the pressure will hold it. I marked the picture where the 5th toe is inserted.
-
22 from the 350Q make a pinch twist to form the heel of the foot. Cut of remainder. Repeat this for 2nd foot. Make a tiny tiny bubble in each 350Q and use it to lock the foot in place.

-
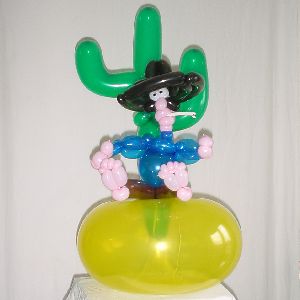
23 and here is fred taking his applause...

-
24 This is fred with a beard. It's just a loop from a 160Q, again locked in place at the same place as the eyes.
-
25 This is a variation I created for a client once with smaller lips.
-
26 This variation is made with a 260Q nose and 350Q head/lips. Fred that is explained uses a 260Q head to be able to add hair and beards and stuff on it without making the head too big.
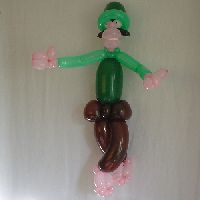
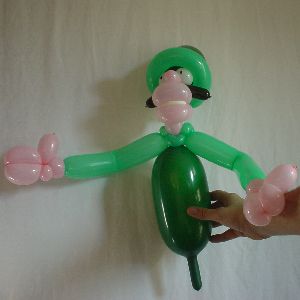
This figure is quite the same as fred, instead it has a different hat, an 8 bubble 260Q body and shoes instead of bare feet.